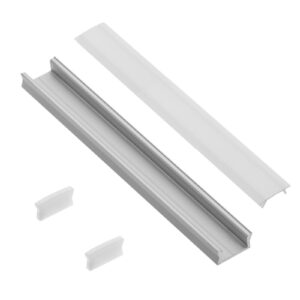
The mini overlay profile is the perfect solution for those looking for a simple and convenient way to install LED lighting. This elegant profile with a small cross-section of 14x7 mm provides an aesthetic finish and effective hiding of LED strips up to 10 mm wide.
One of the biggest advantages of this profile is its easy assembly. Thanks to special mounting brackets with small, curved blades, the profile can be easily mounted in the desired location. It is recommended to place the handles at a distance of no more than 1 meter, which guarantees stable and reliable maintenance of the profile.
To attach the mounting brackets, simply screw them to the surface with a 3 mm diameter screw and a conical head. Be sure to choose screws with a maximum head diameter not exceeding 6 mm.
By purchasing this kit, you get not only a mini profile, but also additional elements that will facilitate assembly. The kit includes a cap, two end caps and two mounting brackets. Thanks to this, you have everything you need to easily create functional and aesthetic LED lighting.
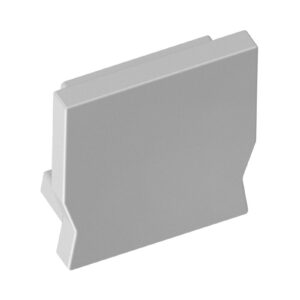
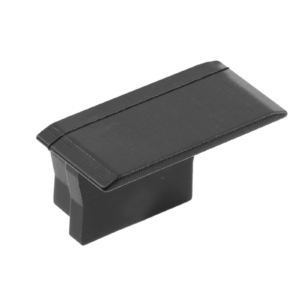
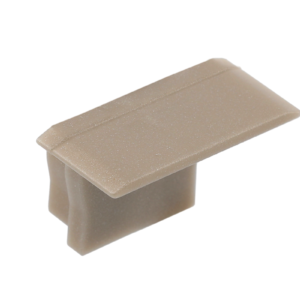
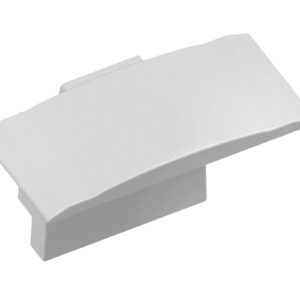
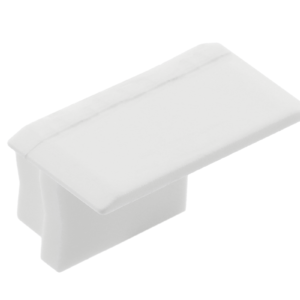
The end end cap for LED profiles is an accessory that is used to protect the ends of the LED profiles and at the same time prevent dirt and insects from getting inside the profile. The end end plugs are made of ABS plastic, which ensures durability and resistance to mechanical damage.
The end end cap for LED profiles is very important because it not only protects the ends of the profiles, but also helps to maintain the aesthetics of the entire LED installation. Thanks to the use of end plugs, the installation looks more neat and professional. It is also important that the end caps are well matched to the LED profile, which will avoid possible light clearances.
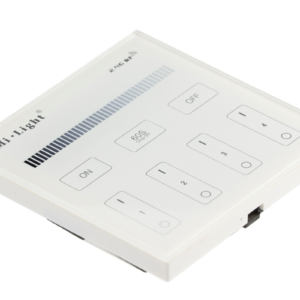
A remote light control system consists of three essential components:
A touch panel is one of the two available control devices. The panel can be used to control 4 zones independent of each other. Many single controllers responsible for a single light point can be assigned to each zone. The panel is powered by two AAA batteries (not included in a set).
On the panel we will find:
Zone coding
It is necessary to determine to which zone the controller is to be coded. Then we disconnect the power supply of the controller for at least 10 seconds. After reconnecting the power supply, the ON button of the selected zone should be pressed 3 times within 3 seconds. Correct pairing is signalled by the LED strip blinking 3 times.
To activate the night lighting function, that is, the maximum dimming of the LED strip, the OFF Master or OFF button of the selected zone should be held.
The panel is mounted by screwing/sticking the mounting plate to the selected surface. The mounting plate has a built-in magnet to which the control panel is attached. This solution makes it easy to replace the battery.
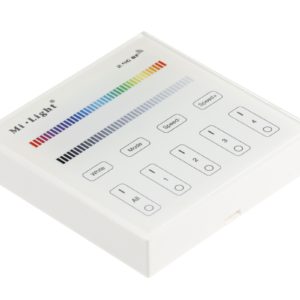
A remote light control system consists of three essential components:
A touch panel is one of the two available control devices. The panel can be used to control 4 zones independent of each other. Many single controllers responsible for a single light point can be assigned to each zone.
The panel is powered by two AAA batteries (not included in a set).
On the panel we will find:
Zone coding
It is necessary to determine to which partition the controller is to be encoded. Then we disconnect the power supply of the controller for at least 10 seconds. After reconnecting the power supply the ON button of the selected zone should be pressed 3 times within 3 seconds. Correct pairing is signalled by the LED strip blinking 3 times.
To activate the night lighting function, that is, the maximum dimming of the LED strip, the OFF Master or OFF button of the selected zone should be held.
In order to turn on the white colour for the selected zone, the ON button of the selected zone should be held longer.
The panel is mounted by screwing/sticking the mounting plate to the selected surface. Then, the panel is inserted into the mounting plate.
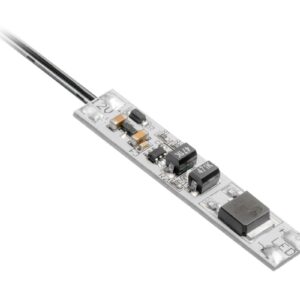
Non-contact switch for mounting inside the profile. The switch is equipped with a 2-meter long power cord. Supports tape sections with a power of no more than 60W. It does not have a dimming function. Readiness for work is indicated by a blue LED. It also makes it easier to find the switch at night. Do not connect the switch under voltage. The first start should take place with the casing attached.